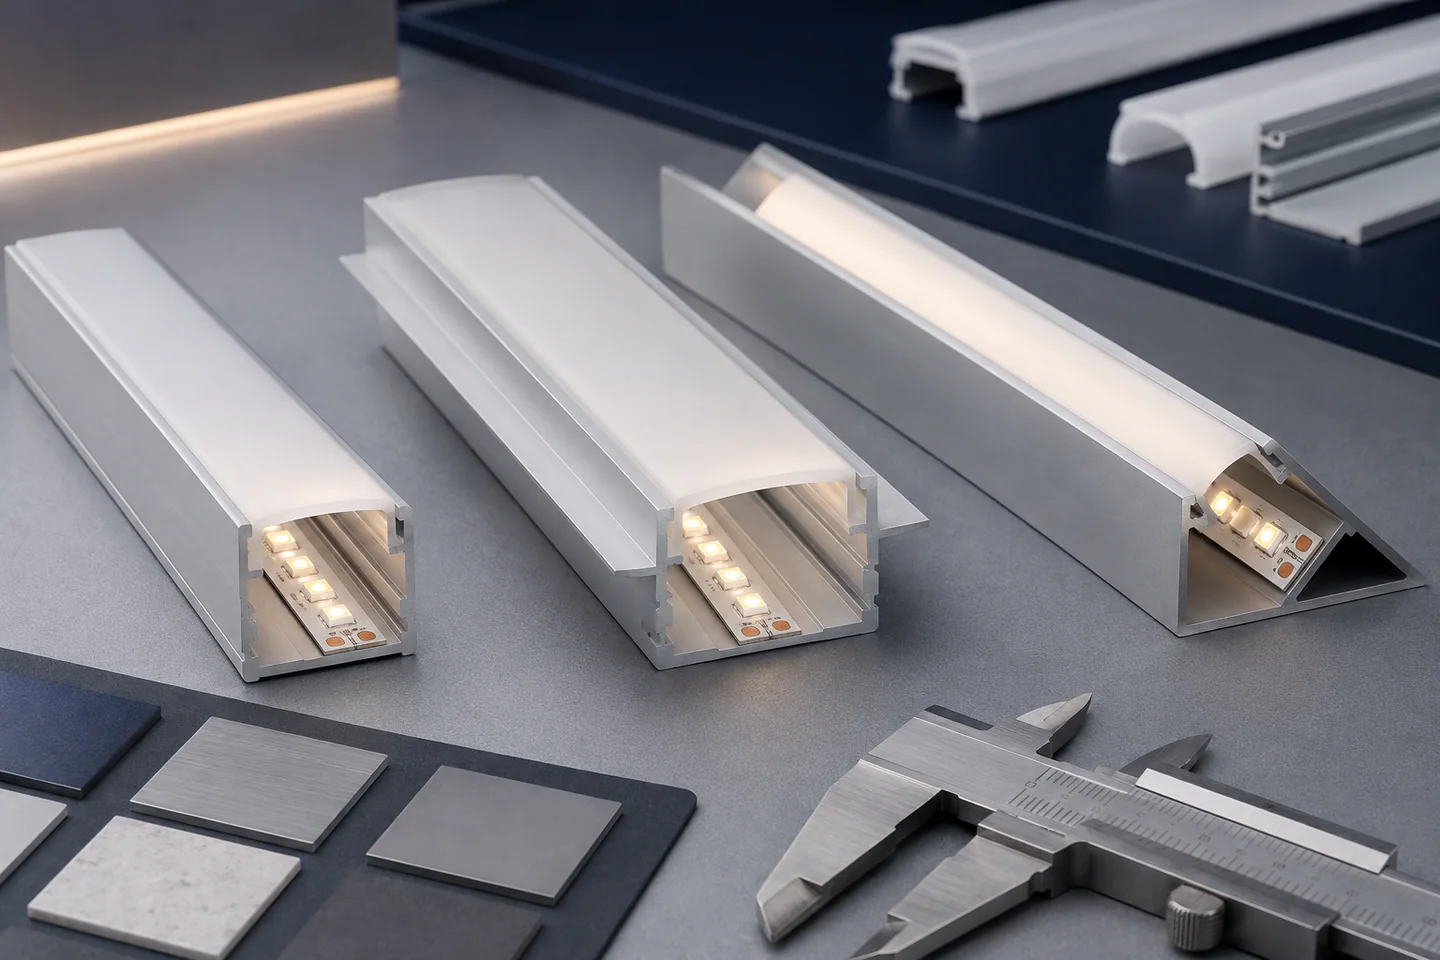
The short answer
Choose an aluminum profile only after you know the strip’s actual PCB width, connector clearance, watts per meter, required light-line appearance, mounting detail and maintenance plan. The profile must have enough usable internal width, enough depth for the diffuser to mix the light, and a continuous mounting surface that can carry heat away from the PCB.
A profile that looks correct in a catalog can still fail on site. The strip may fit but its solder joint may not. A shallow cover may reveal dots. A recessed flange may miss the cutout. An enclosed profile may run warmer than the open sample. Approve the strip, cable, connector, end cap, profile and cover as one assembly.
Choose the mounting type from the detail
Start with the drawing, not the profile name.
| Profile type | Useful when | Check before ordering |
|---|---|---|
| Surface-mounted | The channel can remain visible on a shelf, ceiling or cabinet | Overall height, clip position, cable exit and end-cap space |
| Recessed | A flush line is required in joinery, plasterboard or a prepared slot | Cutout width and depth, flange coverage, fixing method and removal access |
| Corner or 45-degree | Light must wash a worktop, display or wall from an inside corner | Beam direction, glare from normal eye positions and room for the connector |
| Suspended or deep architectural | A wider luminous line or more mixing distance is required | Suspension points, driver location, thermal behavior and installation tolerances |
The same extrusion description can hide different internal dimensions. Request a dimensioned drawing and identify which dimensions are usable after clips, end caps and the diffuser are installed.
Check internal width, depth and cable space
PCB width is only the first fit check. A nominal 8mm strip needs more than an 8mm channel if solder beads, coating, silicone, side walls or a solderless connector add width. The strip should sit flat on the base rather than bridge a ridge or curve up the wall.
Confirm these points on the production-intent sample:
- usable base width, not only the external profile width;
- clear height below the diffuser;
- connector width and height;
- cable bend radius and exit direction;
- end-cap thickness and screw or clip position;
- room to remove the diffuser without damaging finished surfaces.
Waterproof strip constructions often have a larger finished section than the bare PCB. Do not select the channel from the PCB drawing alone. If the project uses a protected model, provide the supplier with the finished strip dimensions and termination method.
Use depth and diffuser to control dots and glare
The diffuser needs distance for neighboring LED beams to overlap. A deeper channel usually gives more mixing room, while a frosted or opal cover can reduce visible points. Both choices can also reduce delivered light, so visual uniformity and illuminance must be checked together.
COB strip can make a continuous line easier in a shallow channel, but it is not automatically dot-free at every joint, cut point, corner or brightness level. SMD strip can also look uniform when LED pitch, profile depth and diffuser are matched well. Our guide to diffusing LED strip light explains the optical trade-offs in more detail.
Make a lit mock-up using the intended CCT, dimming level, cover and viewing distance. Photograph it at the exposure the client is likely to use, but base approval on the agreed visual condition rather than a heavily edited marketing image.
Treat the profile as part of the thermal path
An aluminum channel can spread heat away from the strip, but the result depends on power density, contact between the PCB and profile, extrusion size, mounting surface, airflow and ambient temperature. It is not a universal heat-sink guarantee.
The U.S. Department of Energy’s thermal management guidance for white LEDs identifies drive current, the thermal path and ambient temperature as key influences on LED junction temperature. For a strip installation, that means a profile should be evaluated in the finished detail, not on an open bench.
For high-output or long-hour applications, test a representative section at full load after temperatures stabilize. Include the real adhesive or fixing method, diffuser, enclosure and surrounding material. Compare the result with the limits for the exact strip and associated components. Our article on LED strip operating heat provides a practical test plan.
Approve the complete assembly before volume production
Ask for a short assembled sample with the correct strip, cover, clips, end caps, cable and connector. Install it in a representative piece of joinery or ceiling detail. Then check:
- the strip lies flat along the full base;
- the diffuser closes without pressing on components;
- no dots, dark joints or connector shadows appear at the agreed viewing distance;
- cable exits do not lift the strip or interfere with the end cap;
- the profile can be fixed and serviced without damaging the finish;
- the assembly remains acceptable at full load in the expected ambient condition.
Keep the approved profile drawing, part numbers and assembled sample with the strip specification. A later substitution of the diffuser or extrusion can change both appearance and temperature even if the outside dimensions look similar.
What to include in the profile RFQ
Send the supplier enough information to quote the complete fit:
- strip model, PCB or finished width, voltage and watts per meter;
- surface, recessed, corner or suspended installation;
- available recess and visible flange limits;
- required length, cutting tolerance and finish color;
- clear, frosted or opal cover requirement;
- closest viewing distance and acceptable dot visibility;
- cable entry, connector, end cap, clip and screw requirements;
- indoor or outdoor environment and cleaning exposure;
- operating hours, ambient condition and enclosure detail;
- sample quantity and assembly acceptance checks.
If these details are still open, request a matched strip-and-profile sample rather than approving two separate catalog items. For an application-specific recommendation, send the drawing and project requirements with your quotation request.
Catalog & Sourcing Note
This article is prepared from our current product catalog and B2B specification workflow. Electrical, waterproofing and installation requirements vary by model and market, so confirm the final specification and approved sample before ordering.
Discuss Your Specification