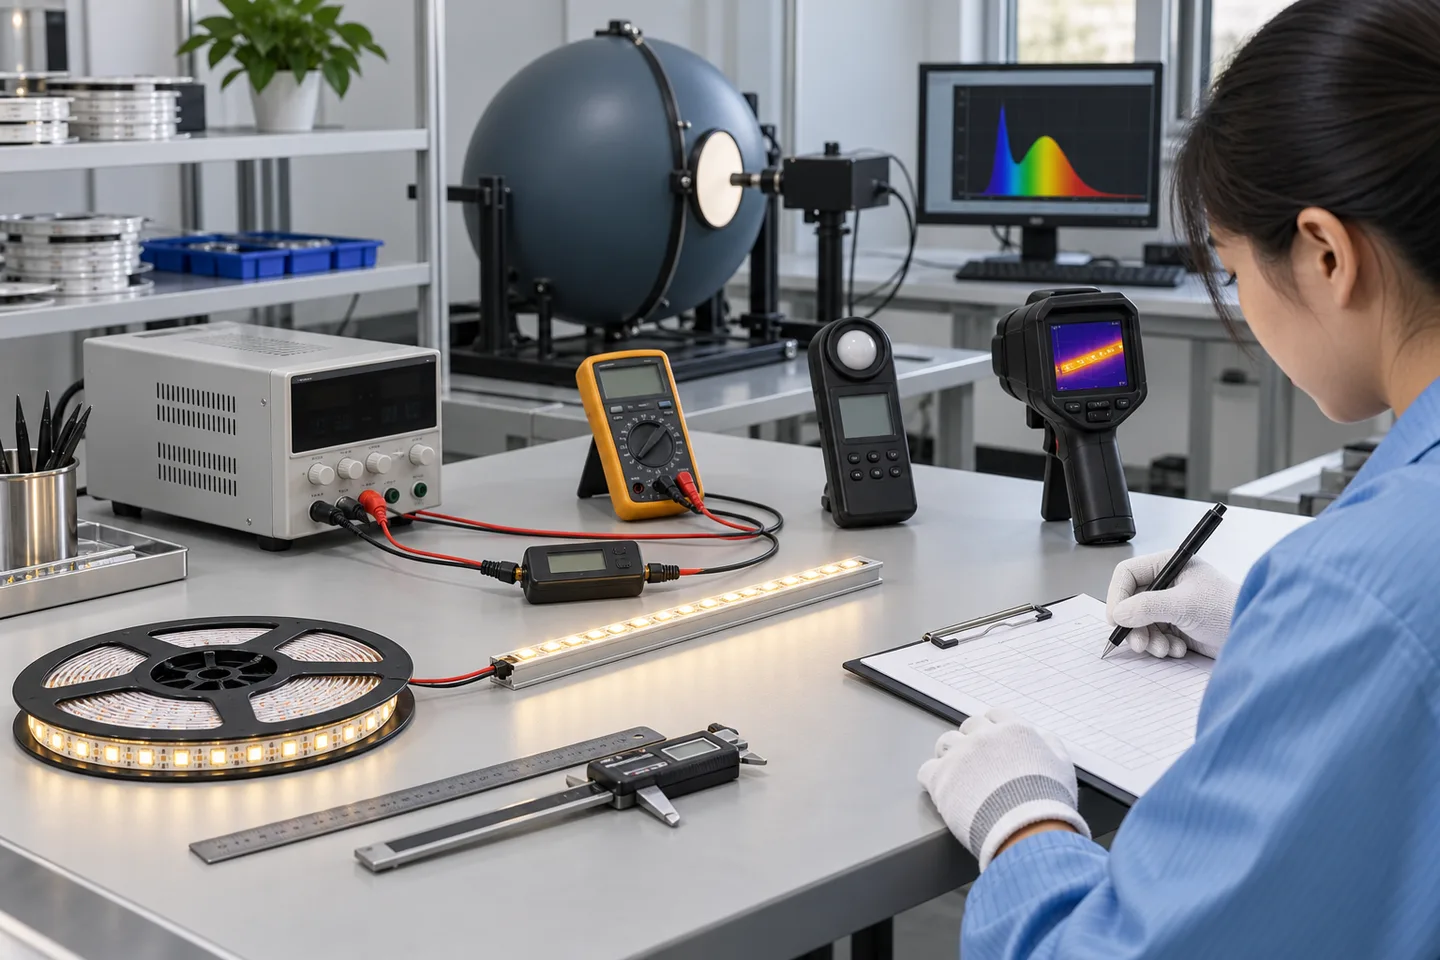
The best starter kit covers identity, size, voltage and power
For a small LED strip importer, the most useful first tools are a steel rule, digital caliper, current-limited DC bench supply, digital multimeter and a suitable DC power meter. Together they answer four immediate receiving questions: Is this the ordered construction? Does it fit? Does it operate at the specified voltage? Does a defined length draw the expected power?
Light output, color, flicker and thermal behavior need additional instruments and a controlled method. If purchasing those tools is not justified by order volume, send retained samples to a capable independent laboratory. A cheap meter with no repeatable setup can create confident-looking numbers that are not comparable.
The seven tool categories are ordered by the purchasing decisions they help an importer make, from basic identity and electrical checks to more controlled optical and thermal measurements.
How the seven tools were selected
Each tool had to answer a different purchase or receiving decision. We favored methods that can be written into an inspection instruction, repeated by another person and compared with a retained sample or agreed limit.
The evaluation used five questions:
- What defect or variation can the tool reveal?
- Can the measurement conditions be recorded?
- Is the result actionable before stock is released?
- What can the tool not prove?
- Does the importer need to own it, or can the test be outsourced?
The list reflects common low-voltage flexible LED strip work as of September 11, 2026. Your inspection plan should follow the ordered model, destination rules and application risk.
Seven useful LED strip testing tools
1. Current-limited DC bench power supply
Best for: controlled first power-up, polarity checks and comparison of samples at the correct DC voltage.
Set the output voltage before connecting the strip. Start with a conservative current limit and increase it only to the value needed for the known sample. This reduces damage if polarity is wrong or a sample has a short circuit.
A bench supply is not a substitute for the final driver-and-dimmer test. Use the actual project components later because cable length, control method and driver behavior can change the result.
2. True-RMS digital multimeter with suitable probes
Best for: DC voltage, polarity, continuity on an unpowered circuit and voltage-drop checks at defined points.
Use voltage mode to compare the strip input and far end while the sample operates. Use continuity only with power removed. Fluke’s guide to measuring DC voltage also warns that leaving a lead in the current terminal can create a short when the user tries to measure voltage.
A multimeter cannot measure total luminous flux or give a complete flicker result. The LED strip multimeter guide explains what its modes can and cannot diagnose.
3. DC power analyzer or correctly rated inline power meter
Best for: watts per meter, current draw and batch-to-batch electrical comparison.
Test a defined length at a recorded input voltage. Measure after a consistent warm-up period, with the same feed cable and connection method. Divide the measured watts by the actual energized length only when the sample length and cut sections are recorded accurately.
An inexpensive USB meter is not suitable simply because it displays watts. Its voltage and current range, connector resistance, accuracy and calibration status must suit the strip circuit. For a large order, compare the receiving method with the supplier’s method before treating small differences as defects.
4. Steel rule, digital caliper and reel-length jig
Best for: PCB width, silicone-body size, cut interval, pitch, lead length and reel-length checks.
The steel rule is often better than a caliper for LED pitch and cut interval because it can span several repeating sections. Divide the total distance by the number of intervals to reduce single-point reading error. Use the caliper for width and thickness, but do not squeeze a soft silicone body until the reading becomes artificially small.
A reel-length jig or calibrated measuring wheel makes length checks faster. Define whether lead wires and unlit tails count toward saleable length before inspection.
5. Integrating sphere with a spectroradiometer
Best for: total luminous flux, color coordinates, correlated color temperature and spectral data under controlled conditions.
Labsphere’s overview of light measurement with an integrating sphere describes why the sphere collects light independent of direction and how a spectrometer-based system can report spectral and color information. The setup still needs suitable calibration, sample geometry, stabilization and ambient control.
A handheld illuminance meter can screen relative changes at a fixed distance and fixture, but lux at one point is not total lumens. If output is a contract requirement, agree on sample length, input condition, warm-up time, equipment and report fields before production. Our lumen verification guide provides a buyer checklist.
6. Flicker meter or photometric waveform system
Best for: comparing driver, dimmer and controller combinations across operating levels.
Flicker belongs to the complete system, not only the flexible PCB. Test the intended power supply and controller at full output and at representative dimming levels. Record the instrument, sampling method, settings and reported metrics.
Labsphere’s flicker test accessory overview illustrates the use of a photodetector and measurement software for temporal-light measurements. A phone camera can reveal obvious bands, but shutter settings and frame rate make it unsuitable as a quantitative acceptance instrument.
7. Contact temperature probes and a thermal camera
Best for: finding hot joints, comparing mounting methods and observing temperature distribution after stabilization.
Use a fine contact probe when you need a repeatable temperature at a defined point. A thermal camera quickly finds unexpected hot areas, but shiny copper and aluminum can reflect surrounding radiation and produce misleading readings. FLIR’s thermography measurement guide explains why emissivity, reflections, distance and focus affect the result.
Record ambient temperature, operating time, input power, mounting profile, airflow and measurement point. A strip lying loose on a bench cannot represent the same thermal condition as one mounted inside a profile.
What each tool proves and what it does not
| Tool | Decision it supports | It does not prove by itself |
|---|---|---|
| DC bench supply | Sample powers correctly at a controlled input | Behavior with the final driver and cable network |
| Digital multimeter | Voltage, polarity, continuity and point-to-point drop | Lumens, full color quality or quantitative flicker |
| DC power analyzer | Power and current for a defined sample | Light output or lifetime |
| Rule, caliper and length jig | Physical dimensions and saleable length | Copper grade, internal material or long-term adhesion |
| Sphere and spectroradiometer | Flux and spectral/color results in a defined setup | Installed illuminance in the customer’s space |
| Flicker meter | Temporal-light behavior for a tested system state | Results with an untested driver or dimming setting |
| Probe and thermal camera | Point temperatures and heat patterns | Long-term life without a validated life model |
Do not convert one good reading into a broad quality claim. A strip can have acceptable power but poor color consistency, or correct width but weak solder joints. The tools work as a set because the buying decisions are different.
Build the kit in three practical levels
Level 1: Small importer or first order
Own the dimensional tools, current-limited supply, multimeter and DC power meter. Keep sealed reference samples and a simple test fixture. Outsource spectral, flicker and detailed thermal work when those results affect the purchase decision.
Level 2: Distributor with frequent receipts
Add repeatable color and illuminance screening, a controlled dark enclosure, temperature probes and fixtures for the main strip families. Periodically compare the screening instruments with a more capable laboratory setup. The goal is fast batch comparison, not pretending a handheld device is an integrating sphere.
Level 3: Brand owner or project buyer
Use a documented photometric setup, system-level flicker testing, thermal imaging and application mock-ups. Maintain equipment records, fixed procedures and trained operators. For high-consequence applications, decide which tests must be witnessed or performed independently.
The best investment level depends on order frequency and the cost of releasing a bad batch. A rarely used advanced instrument with an inconsistent method may be less useful than disciplined basic checks and well-chosen outsourced tests.
A receiving workflow that turns readings into decisions
- Quarantine the shipment. Do not mix unchecked reels with saleable stock.
- Verify identity first. Compare labels, model, reel length, strip width, cut interval and lead configuration with the purchase record.
- Select samples by a written plan. Spread samples across cartons and reels rather than taking only the easiest carton.
- Condition the test setup. Record ambient conditions, sample length, mounting, input voltage and warm-up time.
- Run non-destructive checks before destructive ones. Preserve enough untouched samples for investigation.
- Compare with agreed limits and a retained reference. Avoid changing methods after seeing the result.
- Record exceptions with photos and measurement points. “Too dim” is not an actionable report; a defined result under a defined setup is.
- Hold unclear stock. Resolve method differences before accepting or rejecting the batch.
Combine this toolkit with a written pre-shipment inspection checklist and a disciplined sample comparison process. The order document should state which characteristics are critical and what evidence is required.
Buying and measurement limits
Tool categories and measurement practices were reviewed on September 11, 2026. Models, software and methods can change. Ask the equipment supplier for current range, accuracy, calibration, fixture and training details, and have a competent person review any safety-critical procedure.
When requesting LED strip samples, send your measurable checks through the quote form. We can state which catalog model is closest and identify differences before you build the receiving plan.
Catalog & Sourcing Note
This article is prepared from our current product catalog and B2B specification workflow. Electrical, waterproofing and installation requirements vary by model and market, so confirm the final specification and approved sample before ordering.
Discuss Your Specification