The short answer
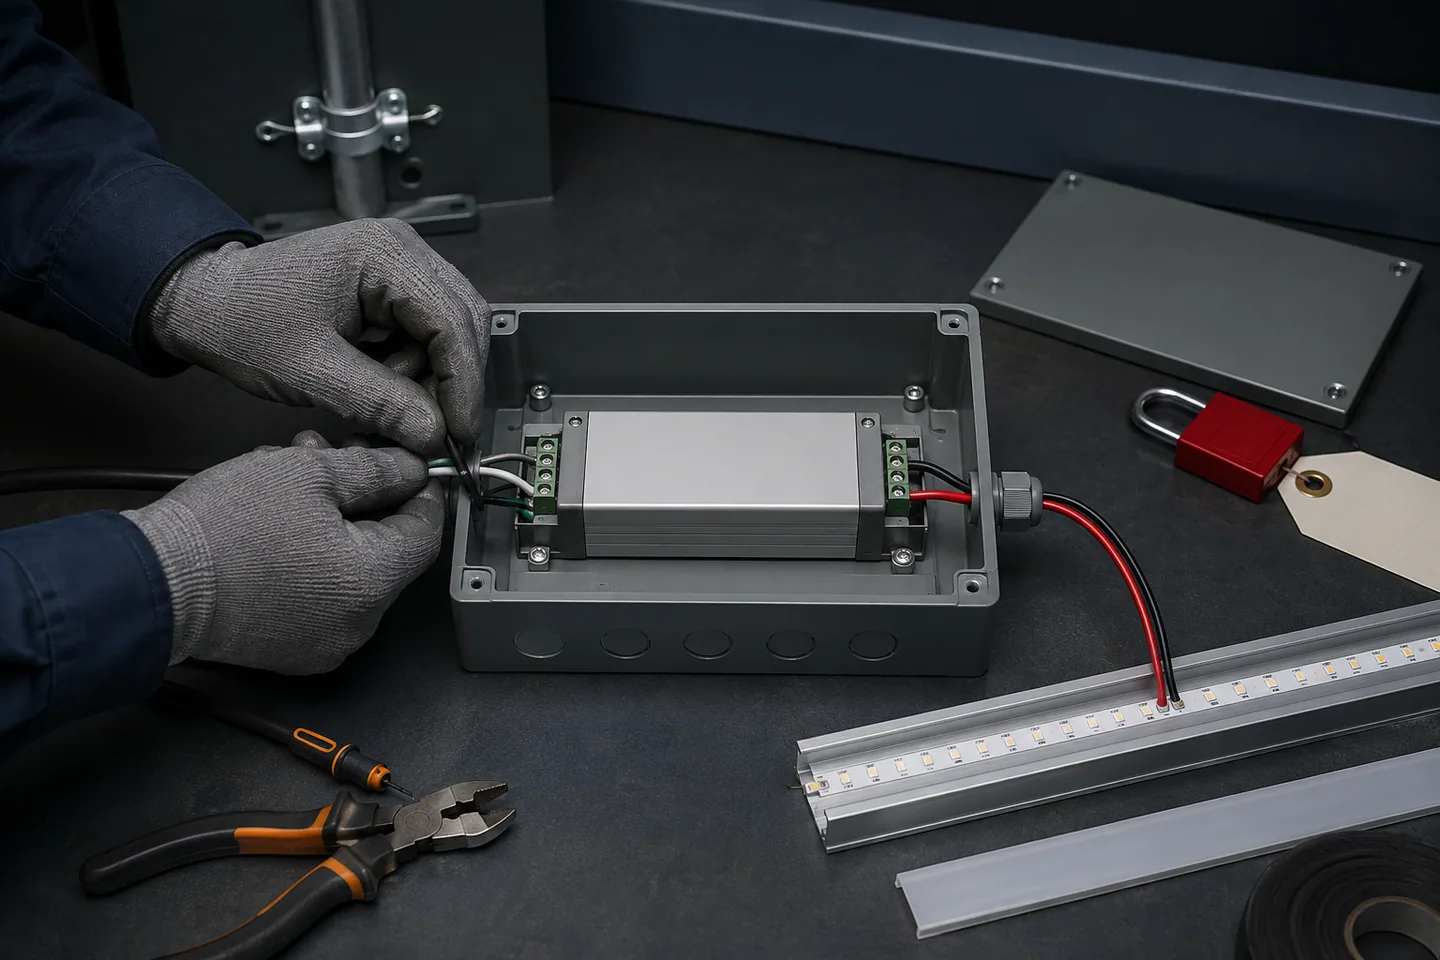
Yes, LED strip lights can be part of a hardwired installation, but a low-voltage strip is not connected directly to building mains. A typical fixed system connects building power to a suitable enclosed constant-voltage driver, then connects the driver’s low-voltage output to the strip. A switch, dimmer or control system must be placed where the chosen driver architecture expects it.
Permanent mains wiring must be designed and installed by a qualified electrician under the rules that apply at the project location. The strip supplier can define the strip-side voltage, power and connection requirements, but should not guess the building-wiring method for another country.
Before ordering, answer four questions:
- Is the strip low voltage or mains voltage?
- Where will the driver remain accessible and ventilated?
- Will the wall control switch power, send a dimming signal, or both?
- What is the load and voltage drop on every low-voltage branch?
Choose the electrical architecture first
Low-voltage strip with a hardwired driver
This is the usual approach for 12V or 24V LED tape in cabinets, coves, reception desks and display fixtures. The system has two clearly separated sides:
- building supply to the driver’s input;
- driver output to the LED strip and any low-voltage controller.
The selected driver output voltage must match the ordered strip. A 24V driver must not feed a 12V strip. Calculate each branch from the exact watts per meter and installed length, then include the design allowance required by the driver maker and project designer.
Plug-in adapter hidden behind furniture
A plug-in adapter is not automatically a hardwired system merely because the cable is concealed. The receptacle and adapter still need safe access, ventilation and strain relief. Do not trap an adapter inside a sealed cavity or leave an extension connection where it cannot be inspected.
Mains-voltage LED strip
Some LED strips are built for a mains-voltage supply using a model-specific rectifier, plug, end cap and insulation system. That is a different product architecture, not a way to bypass the driver on a 12V or 24V strip.
Our catalog includes an AC220V SMD2835 IP20 driver-free model. Its stated construction applies only to that model. It must not be used as evidence that another strip can accept mains voltage, and its suitability for a destination and installation must be assessed before purchase.
Plan the driver, enclosure and access
Select the driver from the complete load
Use:
branch watts = strip watts per meter × installed meters
Add all branches supplied by the driver, then check output voltage, rated power, ambient limits, enclosure needs and the manufacturer’s loading instructions. A driver that is large enough in watts can still be wrong because of output voltage, dimming interface, environmental construction or installation method.
The power-supply and voltage-drop guide gives a step-by-step calculation. Do not size from reel length alone when only part of a reel will be installed.
Keep mains and low voltage organized
Use the terminals, cable entries, grounding arrangement and enclosure specified by the electrical designer and equipment maker. Provide strain relief so neither the building cable nor the strip lead pulls on a terminal. Keep low-voltage distribution identifiable and separate from mains wiring as required for the system.
Make service possible
Drivers and controllers can fail before the LED tape, and connections need inspection. Put them behind a removable panel, in an accessible service void or in another approved location. Record their positions on the as-built drawing.
Do not bury a driver behind plasterboard or seal it inside cabinetry without considering access and heat. The measured surface temperature of a closed cabinet is not a substitute for following the driver’s ambient and spacing instructions.
Decide how the wall switch or dimmer will work
Simple on/off switching
A wall switch may control the mains supply to a non-dimming driver. Confirm how the driver behaves after power returns and whether frequent switching suits the intended use. For a hotel or retail space, ask whether the lighting should return on, remain off or restore its previous state after an outage.
Mains-side phase dimming
Only use a phase-control dimmer with a driver designed for that input method. The dimmer, driver and connected load need a compatibility check. Minimum load, dimming range, inrush current and low-end stability can affect the result.
Lutron’s LED driver control overview shows why two-wire and three-wire driver controls use different power and control conductors. Its diagrams are product-specific; use the installation instructions for the exact equipment selected.
Low-voltage PWM or building control
A fixed mains feed may remain on while a low-voltage controller varies the strip output. Other systems use 0–10V, DALI, DMX or a wireless receiver. Define whether a wall device switches power, sends a control signal or communicates with a gateway.
The controller still needs to match strip voltage, channel count and load. Use the controller compatibility checklist for single-color, CCT, RGB, RGBW or addressable tape.
A safe installation sequence
The electrician and installer should agree on a sequence before work starts:
- Confirm strip model, voltage, branch length, driver and control interface.
- Mark driver, controller, junction and access-panel locations.
- Isolate the circuit and verify it is de-energized using the required procedure.
- Complete mains wiring inside the specified enclosure.
- Route low-voltage cable with the correct conductor size and polarity labels.
- Mount the aluminum profile or other approved heat path before applying the strip.
- Connect short test sections and verify polarity/control behavior.
- Install complete runs without twisting the tape or loading solder pads.
- Add power injection only according to the approved branch drawing.
- Close enclosures and fit diffusers after inspection and testing.
If strip leads need field joints, use a connector qualified for the exact PCB width and current, or follow a controlled LED strip soldering method. A loose joint hidden above a ceiling is not an acceptable commissioning result.
Commission the complete hardwired system
Test the longest and most heavily loaded operating condition, not only one short section. Record:
- driver input and output behavior under load;
- voltage at the start and end of each branch;
- current or power for the complete operating state;
- dimming from high to low level without visible instability;
- all CCT, RGB or addressable channels, where used;
- operation after switching power off and on;
- controller pairing and recovery after an outage;
- temperature after stable operation, using the equipment limits and agreed method;
- absence of exposed conductors, loose glands and cable strain;
- access-panel location and circuit/branch labels.
If the end of a long run is dimmer, do not immediately increase driver voltage. Check conductor size, route length, connector losses and feed arrangement using the wire-gauge guide.
What to include in a hardwired LED strip RFQ
Send the supplier and electrical contractor the same system information:
- project country and installation type;
- strip model, selected voltage, CCT/color and watts per meter;
- length of every branch and total quantity;
- driver location, available enclosure space and ambient conditions;
- on/off, phase-dim, 0–10V, DALI, DMX, RF or other control method;
- number of independent zones;
- cable route lengths and proposed conductor size;
- connector, soldered lead and power-injection requirements;
- dry, damp, outdoor or cleaning exposure at each component;
- profile, diffuser and access-panel dimensions;
- commissioning tests and documentation expected from the installer.
A 12/24V COB 8mm 320 LED/m strip can be considered for a driver-based fixed installation, but the final voltage, driver, cable and control choices must be locked together. Attach the circuit sketch to the quotation request so the proposed strip configuration can be checked against the installation plan.
Catalog & Sourcing Note
This article is prepared from our current product catalog and B2B specification workflow. Electrical, waterproofing and installation requirements vary by model and market, so confirm the final specification and approved sample before ordering.
Discuss Your Specification